DynamicDNS
How I Set Up Dynamic DNS
I’m on a Safaricom Home Fiber subscription. It’s quite good. I almost always get upto 4.6 Mbps which is good enough, but maybe this is because I work during ghost hours (11pm - 5am). So this connection refreshes its public IP every 13 days or so thus I needed to set up Dynamic DNS.
Dynamic DNS for what ?
You may ask. I have a Raspberry Pi 3B that I absolutely adore (a lil’ bit too much) and want to have with me everywhere. Because setting up a Portable Pi is quite expensive and bulky to carry, I did the next best thing (opinion). I bought a domain.
CloudFlare
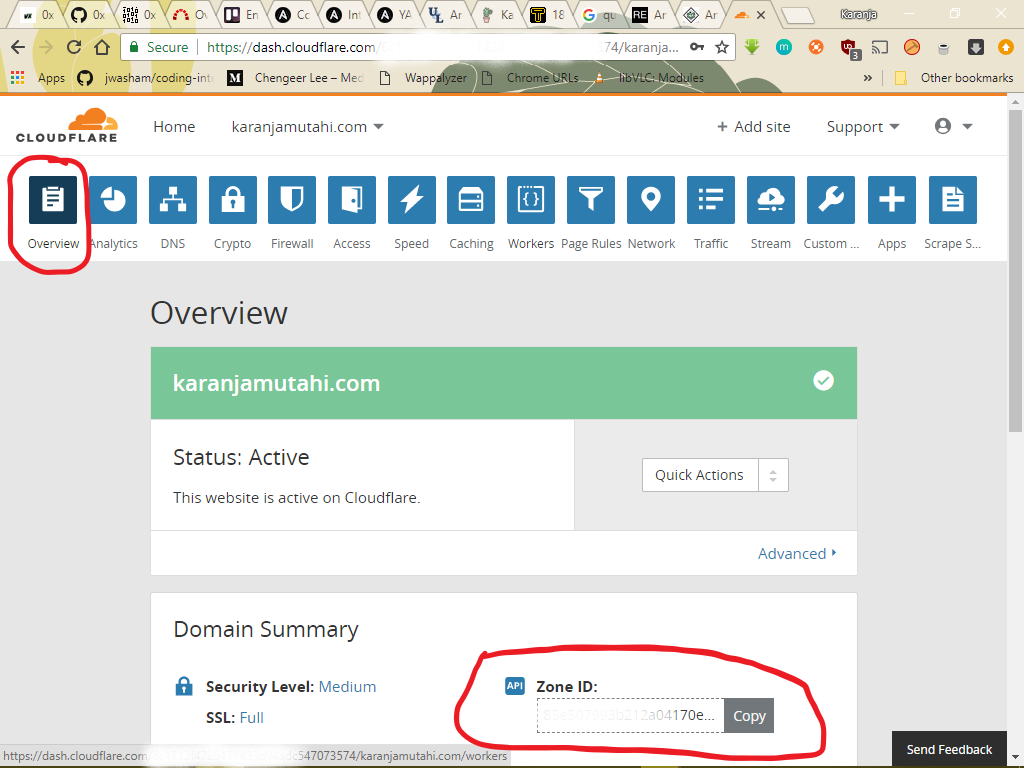
I bought the domain name from Kenya Web Experts but I immediately changed DNS management to CloudFlare, on their free plan. I set up an A record to point to my current public IP, then got my API keys and Zone ID for that record.
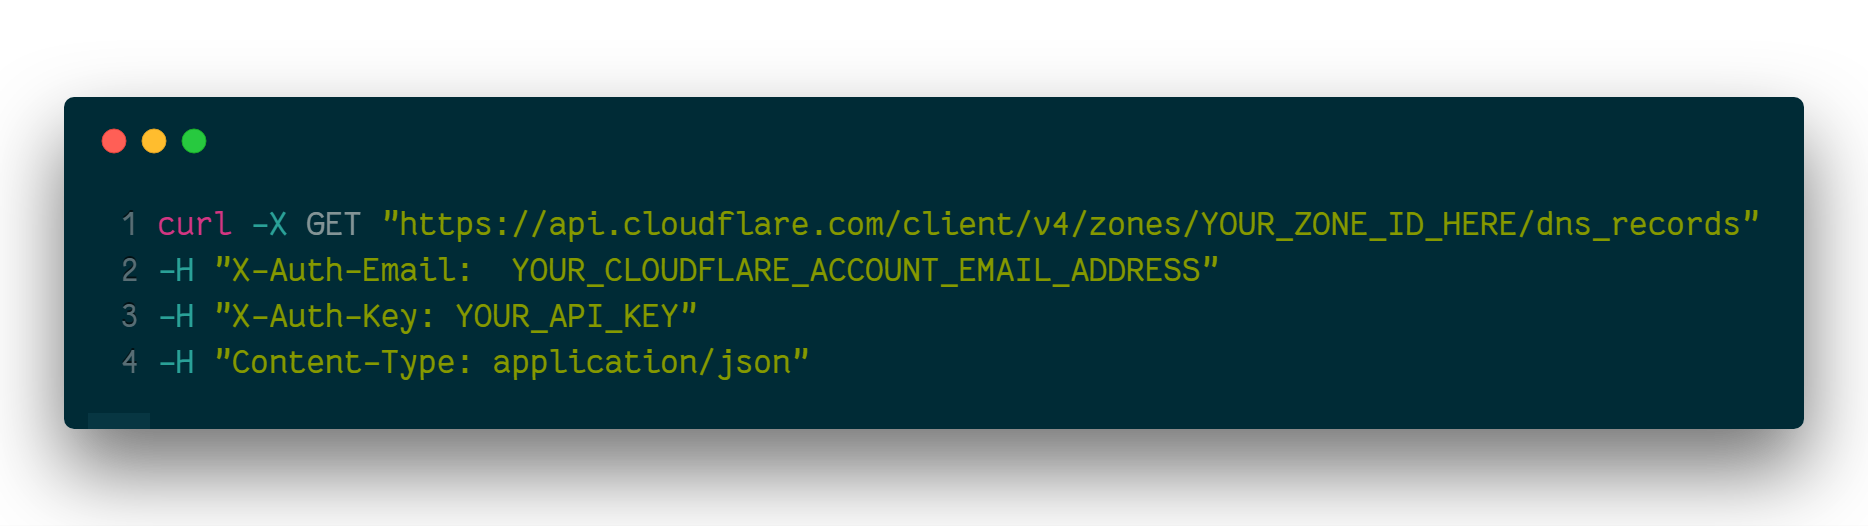
Your API Key is in your profile.
You also need a Zone Identifier which can be found in the overview section of your cloudflare page.
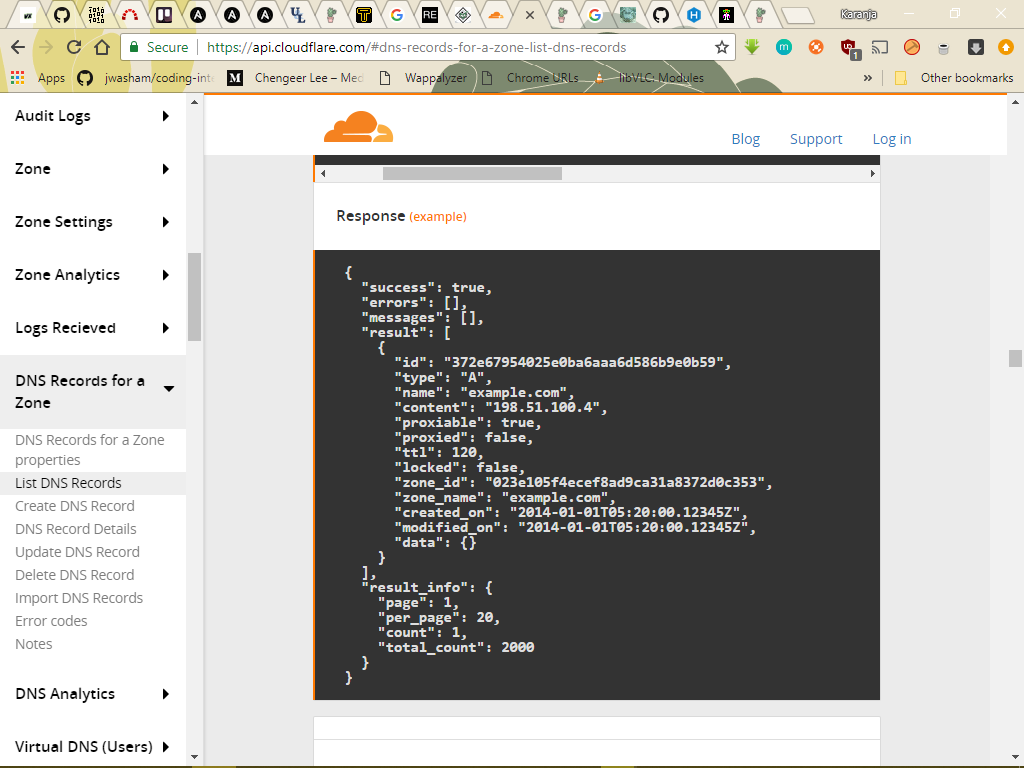
Once you get these two, Send a GET request to zones/:zone_identifier/dns_records
This will return json with all your DNS records. What we want is to extract the record ID for our dynamic record.
Once we have that, next step is to write the code to send the API request to cloudflare. This should be done in a language of your choice. I did it in Python.
Its very easy to do. Try it out on your own. If you get stuck you can always reach out to me on Twitter.
Once we’re done we add the file to crontab to run every two hours and a logging file. (My Pi is always on btw :)
To do this run:
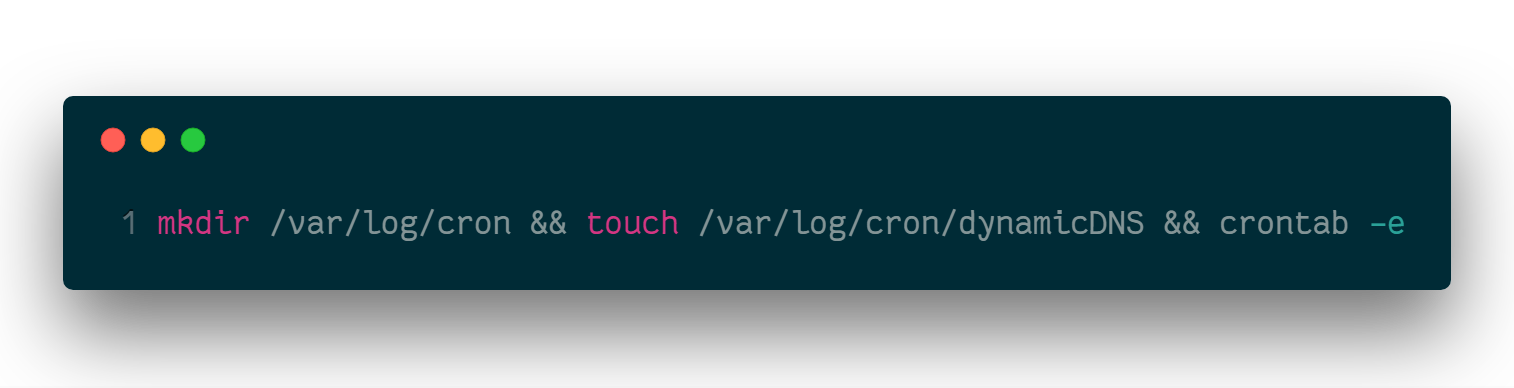
This will open your current crontab, or create a new one if you don’t have. (You may need to select your preferred text editor, Vi FTW :)
Add the following line :
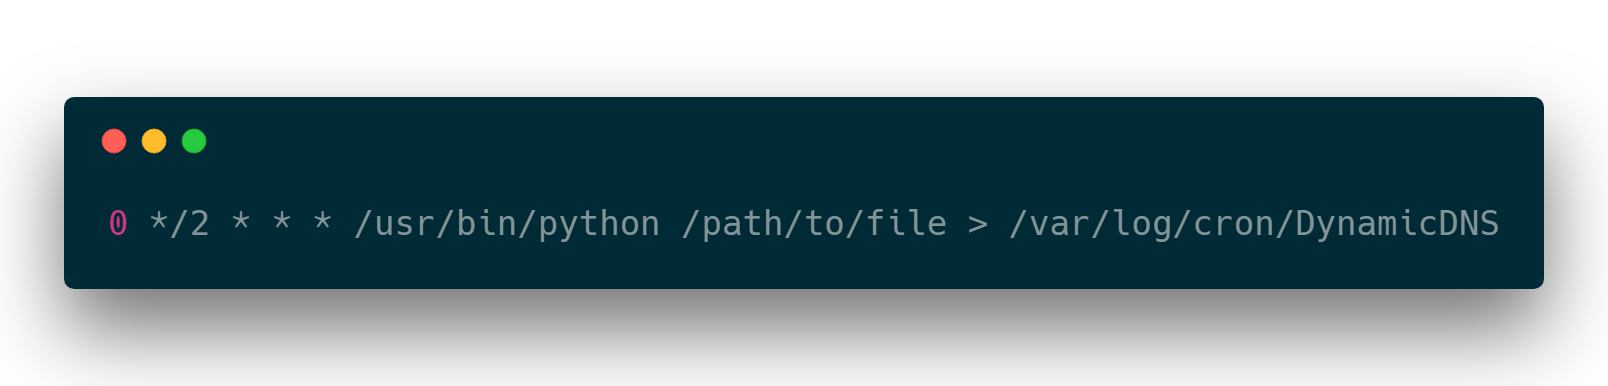
This will run the command every two (even) hours and send the output of the python script to the log file you created above.
We’re still not done
We need to have the raspberry pi always connect to the same IP address every time (static IP). To do this, connect your pi to a monitor and click the wifi icon. It’s a pretty easy process and you should be able to do it quickly. For guidance, read this or ping me on Twitter.
Port Forwarding
The point of this whole exercise is wanting to be able to SSH into my pi from anywhere, therefore I need to port forward external traffic through my router to my pi. To do this on Safaricom Home Fibre, access the web management portal on 192.168.100.1. Be Sure to change the default password if its your first time doing this !!!!! Do NOT miss that step.
Then Click on the Port Forwarding Tab :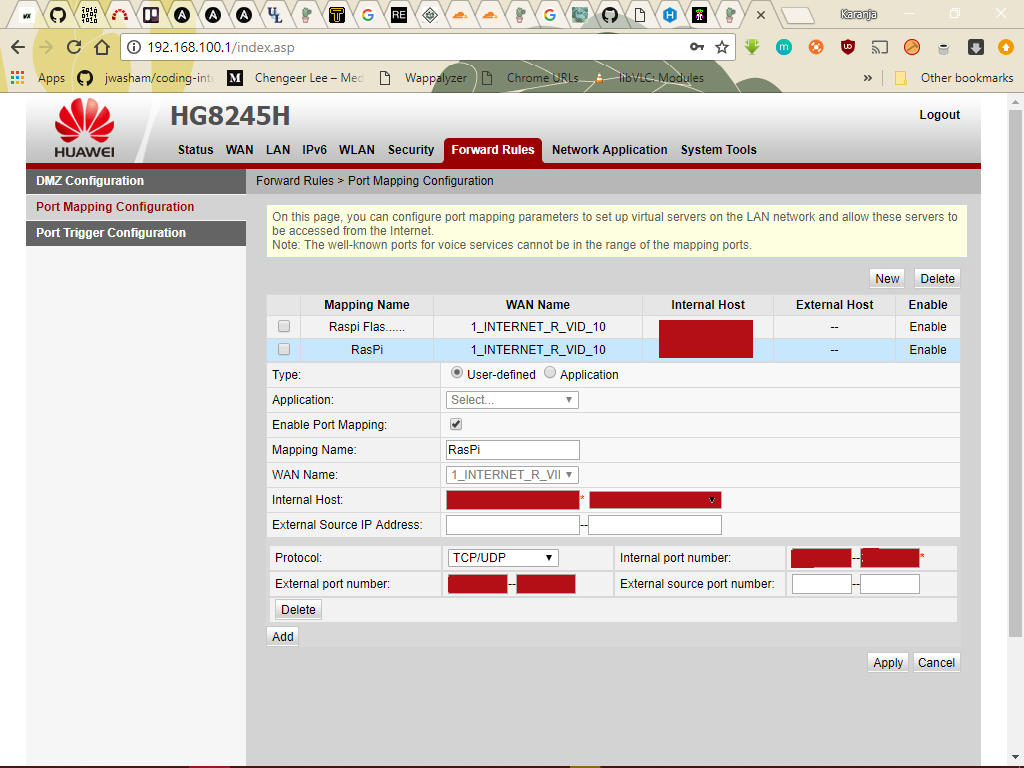
What we want to do is forward all requests through a certain port [start port] at the domain to our host (raspberry pi), on a port we specify [end port]. Note, these ports can be a range. Safaricoms’s management portal allows for this. I’d suggest you specify a range, so that you can set up new services when you need them.
Remote SSH
Because I want to be able to remotely SSH into my pi, I specify my SSH port as the start port and end port. In case you’re wondering, it has to be the end port, but it doesn’t have to be the start port. It’s just easier to remember.
Secure your SSH!!
PLEASE NOTE!: It’s a HUGE security risk to expose your SSH port on the open internet. Read this guide on how to do it securely if you’re unfamiliar.
And we’re done. That’s all the steps it takes to set up Dynamic DNS on a raspberry pi and a useful application. In case of any queries, ping me on twitter.